3.31.2013

Inspire me Sunday : peaceful blue

peaceful blue sky
peaceful blue sky
peaceful blue sky

Hello peaceful Sunday. I woke up this morning hesitating if I should sit in front of the screen and try to finish my work. I decided against it. My eyes are getting dry from too much computer work and Sunday should be an energy-charging day so that I can work effectively in the next whole week.

Still, it seems that I just can't get away from the web too long. I miss blogging and you know what, this is the first week that I post everyday! Even better news is that I didn't force myself to write. I just felt like doing it. I found myself thinking what I would talk about during the day and sat down and wrote it at night. It will be great if I can make this a habit. Imagine having 365 day posts at the end of the year! Sounds too ambitious but it's fun to dream :D

Today I just want to throw in some beautiful blue sky photos with short message and then I realize this and words just come flowing. I just love it ;)

Have a beautiful merry day everyone!


3.30.2013

DIY project : Making book jacket from toothpaste boxes

diy making book jacket from toothpaste boxes01

Another DIY idea I did for a TV show's DIY section I talked about last week. I did two ideas altogether. The first which was on air last week and I already posted the step-by-step instruction here is DIY project : Let's make butterfly bookplate! My other idea will be on air tomorrow. This time I'm going to make a book jacket from toothpaste boxes :)

I had been wondering how I could transform toothpaste boxes into something useful for some time. Don't know why I should think about it but I just did. My first idea was making bookmarks. Then I tried cutting a box and laid it out. I found that the size of the box paper, excluding the lid parts, is perfect for making a jacket for old book.

So, let's try making one :)

diy making book jacket from toothpaste boxes02

First,  cut a toothpaste box and lay it out. Cut off the lids part from top and bottom. You will see that the remaining part is a bit bigger than my book which is a small pocket book (about 13 x18 cm). We don't need to cut more as the big sheet will function as the book's protector.

diy making book jacket from toothpaste boxes03

As the toothpaste box has its own creases, we don't need to fold the spine part ourselves. Just have to measure and cut this part a bit so that the jacket's spine will be a  bit bigger that the book's.

diy making book jacket from toothpaste boxes04

Cut another box just as we did with the first one. Now with two paper sheets, we have front and back of the jacket. Combine the two by gluing the spine part together.

diy making book jacket from toothpaste boxes05

We have the jacket! Next is to make the whole thing pretty. Find a used shopping bag or document envelope, measure and cut, make it a bit bigger so that it can wrap around the jacket for double protection.

diy making book jacket from toothpaste boxes07

Above are the wrapping steps for the corners.

diy making book jacket from toothpaste boxes08

Next, cut a sheet of beautiful wrapping paper or maybe some big magazine pages and glue it down over the inner part to hide the toothpaste box.

diy making book jacket from toothpaste boxes10

We will need locking parts to hold the book. I use two paper sheets left  from the toothpaste box cutting in the first step to make these or you can find some other paper sheets. The sheets should be a bit thick and  strong enough to hold the book. Cut it into two long rectangular pieces just as in the image. Cover them with lovely paper wraps.  Make it beautiful.

diy making book jacket from toothpaste boxes11

Attach the two parts left and right by gluing only the top and bottom of each rectangular sheet. Leave  the middle part unglue so that we can slip the book's covers through.

diy making book jacket from toothpaste boxes12

Try insert the back cover.

diy making book jacket from toothpaste boxes13

Then the front.

diy making book jacket from toothpaste boxes14

Almost done! The last step is to decorate the front. Make it your style with some bright colorful scraps of paper from notebooks or paper bags.

diy making book jacket from toothpaste boxes15

So, here is my design. You can use this jacket for day planner, notebook or make it as a wrapping of book gift. You can also add a strap made from the paper bag's rope handle. Another reuse!

diy making book jacket from toothpaste boxes16

Use paper puncher to punch out both front and back then add the ropes on. Complete!

Hope you like this DIY. I try to write the instruction as clear as I can.  If you have any questions, please leave a comment. And if you think this idea is helpful, please share :)

This is the last idea I did for the TV show but I think I will continue thinking and making things from scraps of paper I have in my studio.  Doing DIY is really fun and relaxing. It helps me think in different angles and once I get some ideas and start creating, the step-by-step process is just like a meditation practice. I really love that :)

PS. I just got an idea the other day while getting stuck in traffic. The idea is to transform tissue box into a card holder. Do you think I can make it? :)

diy making book jacket from toothpaste boxes17


3.29.2013

A sweet gift from a sweet friend. Thanks so much my lovely smuggler!

conell-sweetblog

Just got this lovely card and gift from a wonderful friend, Conell. I have known Conell for some years. We have never met. She lives in United States and I live in Thailand. Just like crossing the earth, but thanks to the internet and blogging that we get to know each other :)

To be honest, I'm not good at writing letters. I love receiving mails or postcards but as much as I would love to, it seems that I myself don't find time to connect back.

That's a confession. I feel guilty :(

There are so many people from many places that have been kind to me. Conell is one of them. We are not so close but she regularly sends me good thoughts. I always smile when I find her letter in my mailbox and try to write back as soon as possible. Perhaps Conell doesn't realize this but I think she has a gift of giving. She is happy to write and send out love with beautiful cards carefully picked and I'm sure every one of her mail receivers will smile just like I do. That's the best gift of all, to make people happy.

And I want to be a giver too. Maybe I could start by writing her back and then write another postcards to some other friends too? :)

Thanks for the inspiration, Conell, and I love the Twizzlers. You are such a sweet smuggler! lol


3.28.2013

Self-portrait : from where I stand

begirlish

The very first photo for  Treasure Hunts photo prompts, from where I stand.  I have always liked taking photo of myself (and sometimes with others) from this angle. I think a lot of people do. It tells  a lot of things, places, moods, weather, dressing styles and so on.

It's funny because I rarely wear skirt but it has been so hot lately in Bangkok and wearing jeans is just like killing yourself so I find myself looking for more skirts for my closet. This photo is still me in a sweet, bright and colorful girlish way. I kind of like it though :)


3.27.2013

How do you find inspiration each day?

merryport-phone

How do you find inspiration each day?

I used to live my life as I like it. I mean if I woke up one morning and didn't feel like working or creating, I wouldn't do it thinking forcing myself to do things when I was not inspired was fruitless. I would never do good works anyway. But now I realized that that was a kind of giving up without even attempt to start. The key is that when you get uninspired, don't let such boredom bring you down. I could be bored and depressed for days or even week! That's not good for my creative work at all.  So, I try to adjust myself, to try to find something to inspire me whenever I begin to feel bored.

Generally, I would go to books, browsing through beautiful illustrations, reading lovely words. Or I would go through all the lovely blogs or go to coffee shop, sketching and watching people. Today I have realized that you can get inspired on a daily basis with some payment.

That doesn't sound good, right? To buy inspiration? But I have learnt that it's really worthwhile to pay some money to support those who work so hard with their words, their research and their inner selves to get people inspired.  This I mean some e-courses I have taken. One of them is Creative Courage, Not sure if I talked about this class on this blog yet. I have enrolled for this course twice already and both session give me so much.

Another class is Treasure Hunt photo prompts from Andrea Scher's Superhero life. This is a self-paced class where I get photo prompts in my mailbox everyday. The thing is that Andrea doesn't send me just topics and tell me to shoot this or that. But she sends her little stories along with the topics too. It's just like reading mini inspiring posts everyday. The topics get me curious and want to go out take some photos, her voice gets me inspired and want to do more of creative things. She makes me think, that is.

These two classes made me write the word 'each day' How do you find inspiration each day? These classes give me inspiration each day and I think it's very important to wake up each morning and ask myself what will inspire me today. Don't wait for inspiration, sometimes you have to find one for yourself to keep your creative life on track.

The picture above is what I'm working on, to build up my work for my shop and my portfolio. Yes. I'm still working and I think this is the reason I wake up and try to find inspiration so that I can keep this work going :)

How about you? How do you find inspiration each day?


3.26.2013

Fear revisited and my etsy about page

aboutpage-pavinee

After a lot of thinking, fussing, preparing and thinking again (too much), I finally went back to my etsy shop which had been put on hold for about six months. I walked (virtually) around my shop thinking which part I would adjust, which items I would maintain. I had already did an adjustment on shop banner (the girl with the balloons really enchanted me). Changed my profile and added the shop about page. I made sure that all the billing and credit card details were in check and then suddenly I was afraid.

It's just like that. Fears can come to you at any time. I was fearful what if something wrong with my account, there might be some bugs on my Paypal, my items photos might not be good enough. Maybe I cannot interact with my future customers properly, what about shipping problems and so on.

Sometimes I really hate my imagination...

But I know in my heart that I need to do this. I MUST make it happen! Then I thought of a very good quote I got from Creative Courage e-class. It says :

Sit down and take action. The only way you can overcome fears is through action.


So, I did. I sat down and began drafting my items' descriptions.

The shop is not open yet but if you are interested you can view my about page here >> http://www.etsy.com/shop/MerryDay/about/

I really like the photo slides section. Etsy has just added this feature to their system. I think it's really a great way to tell the story of shop owner. I hope you like it too and I would be very grateful if you could give feedback about this page.

Thank you for coming. Have a merry day!

Pavinee


3.25.2013

Book Beauty Monday : 365 Things to Draw and Paint

365thingstodraw00

Don't you love it when you have something that reminds you of your childhood? This book is one of them. I feel happy every time I take it out from shelf and just browse through it.

There seems to be a lot of activity books out there in the book market these days. This book is one of the very first big edition of activity books Usborne has published (or at least that's what I believe). I specially love this book because I never had this kind of big book before. All the pages are beautiful and have elements that make you think and play (and I'm already a grown-up!). Love color combinations, concepts in each spread and beautiful drawings. This is one of my happy books! :D

PS.  I'm doing a new schedule for this section, Book Beauty Monday. I intended to post beautiful book every Monday at first but now I feel I need more space to talk about my illustration works, my shop improvement, my work life in general. I have found that blogging about my work process helps me focus on my goal more. So, I'm going to post about lovely book every two weeks instead from now on.

Thanks for coming I hope you have a merry day!

365thingstodraw01

365thingstodraw02

365thingstodraw03

365thingstodraw04

365thingstodraw05

365thingstodraw06

365thingstodraw07

365thingstodraw08

365thingstodraw09


3.24.2013

Inspire me Sunday : Liebster award and new blogs following

pinkflower-cookiejar

Hello Sunday again :) I woke up very early this morning feeling like learning something. So many things to make and do. I have one e-course to catch up. A new photo group I have just joined in. New illustration set that I need to complete and shop items that I have to take photos. Sometimes I wonder if I'm going to make it all in my lifetime?

Anyway, it's Sunday, the day of relaxation and inspiration. Today I bring you some links I love through award I have just got from Ni Carnahan.


I have seen this award from other blogs for some time and still think it's a great way to find and connect to new people in blog world. I find new lovely blogs everyday and would love so much to share here :)

But I think I'm not going to follow every rule though, not sure blogs I'm sharing here have less than 300 followers. Just want to share what I enjoy reading recently :)

Here they are.

Lovely blog of children's book illustrator : Fox in Socks by Paige Keiser 

Whimsical drawings and thought-provoking posts on Lizzysapronstrings

Always love reading blogs about drawing and reading : the rain girl (she has beautiful drawing of reading girl here)

Tricia from Daring Hue is doing her pattern a day and other art and craft, I'm inspired by all the energy she has!

I hope you enjoy what I have enjoyed. I just wish I could write more and be a part of inspiration spreading just as these blogs do.

Merry Sunday everyone :)

PS. Have you seen my first DIY? I'm planing to have DIY section on this blog to keep me thinking and creating fun things. You can read my very first one here >>  DIY project : let's make butterfly bookplate!


3.23.2013

DIY project : let's make butterfly bookplate!

17bp-diy

I have been thinking about doing DIY project on blog for some time but never pushed myself hard enough to do it. A chance came when one of my facebook fellows who was doing part-time MC for a TV show about book and reading asked me if I could provide ideas for the show's DIY section. The artist who did this job regularly happened to be unavailable for two weeks. The show is on air weekly and she needed to have two ideas for the section. I was a bit nervous but it seemed so challenging. Sometimes when opportunity knocks, be ready and open your door (even if you don't feel you are ready at all)

The main concept of this DIY section is to create something that promotes reading activity. I was doing bookplates for sale on my shop at the time and thought it might be a good idea for the show.

Generally, bookplates are sheets of paper printed with beautiful illustration. But since the idea of DIY is to make things that can be made by hand easily, I thought we could play with shapes instead of illustrating.

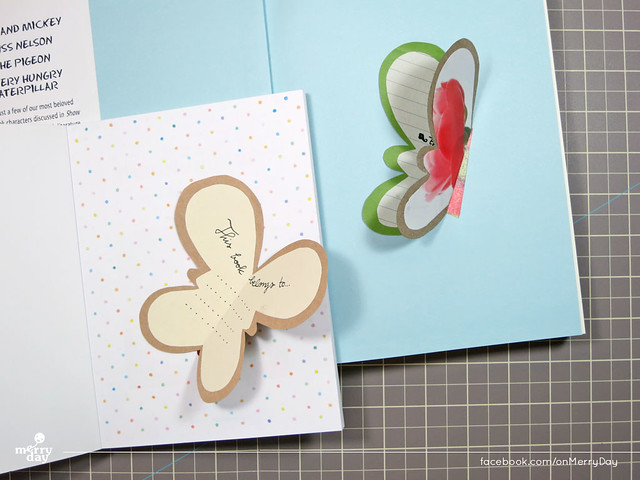
My idea is this easy one, butterfly bookplate. Let's make one fly :)

01bp-diy

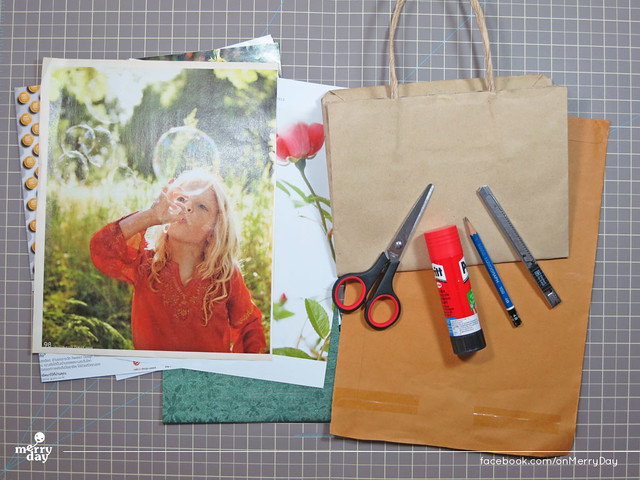
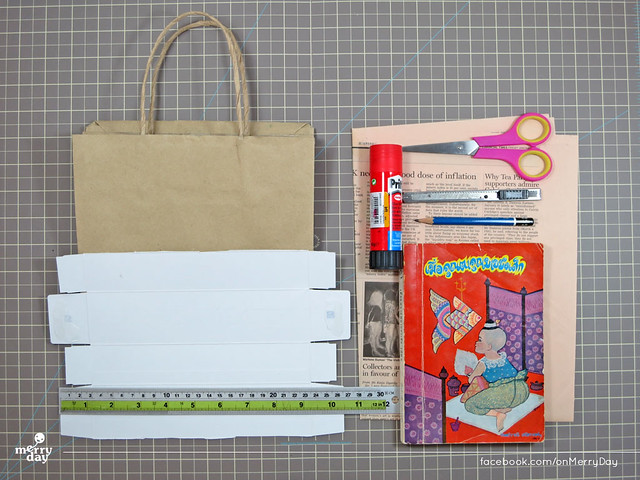
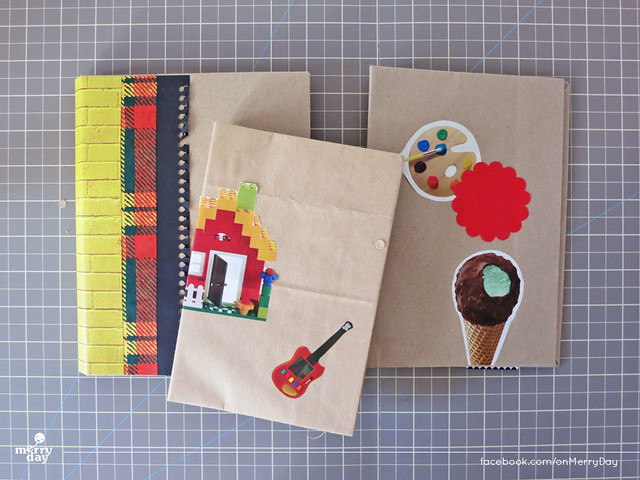
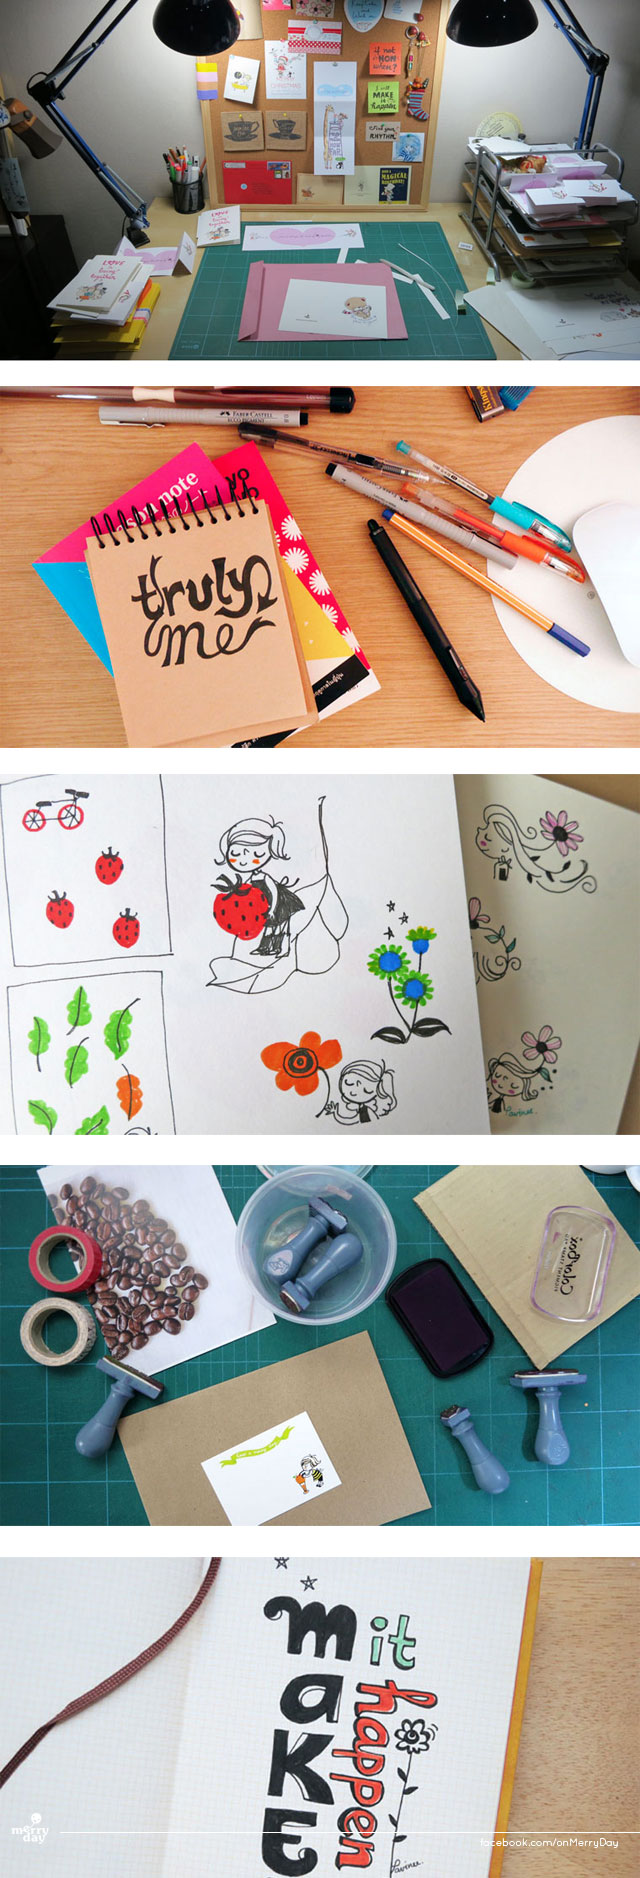
I have been also thinking that if I do DIY project, I will reuse things that can be found at home as much as possible. So, for this project I just use paper from shopping bag, pretty and colorful photos from old magazine, pencil, scissors and glue.

02bp-diy

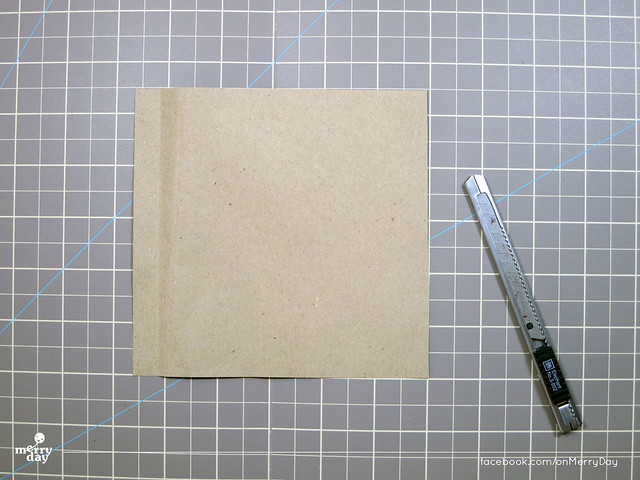
First, cut a square sheet from a paper bag. Use the brown side.
The size depends on how big your book is.

03bp-diy

Fold the paper in half then draw a wing of butterfly.

04bp-diy

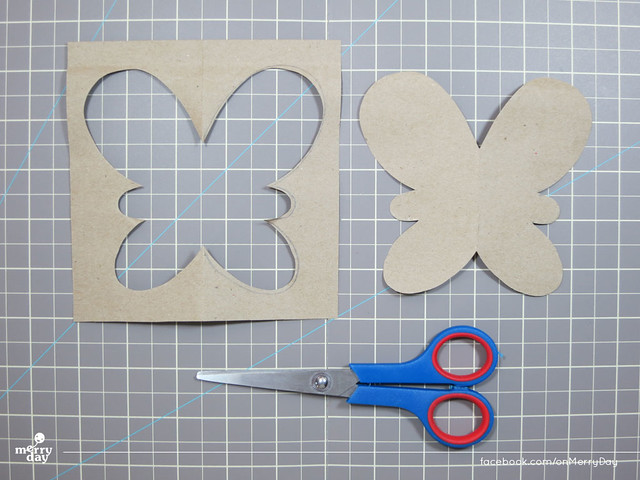
Cut the butterfly out. Unfold it. Now you have the first butterfly with symmetrical wings

05bp-diy

Next, we're going to make design on its wings. Find a photos or pretty page from old magazine. Try putting the cut-out butterfly over the page in different positions to see which part will be best for cutting out.

06bp-diy

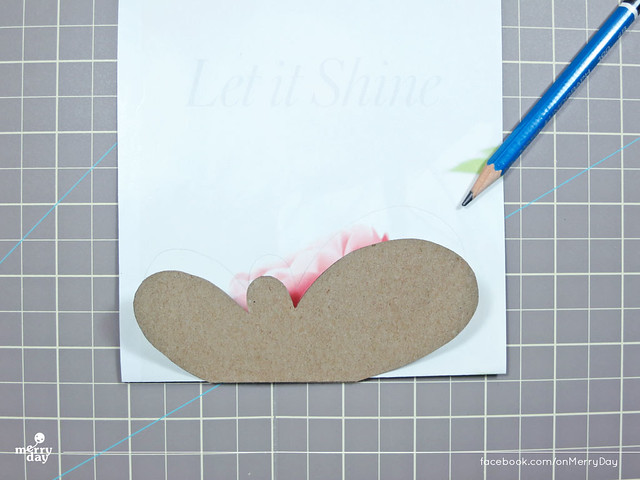
Again fold down the magazine paper and use the first butterfly as a template. Trace the outline with a pencil.

07bp-diy

This time we cut the second butterfly. Don't cut along the line exactly. Just use the pencil outline as a guide and cut smaller one. Now we have two butterflies.

08bp-diy

Next we're going to make a third and final one.  The paper for this part should be in pale color so that what we write on it will be easily read. In this, I use a sheet from a notebook.

09bp-diy

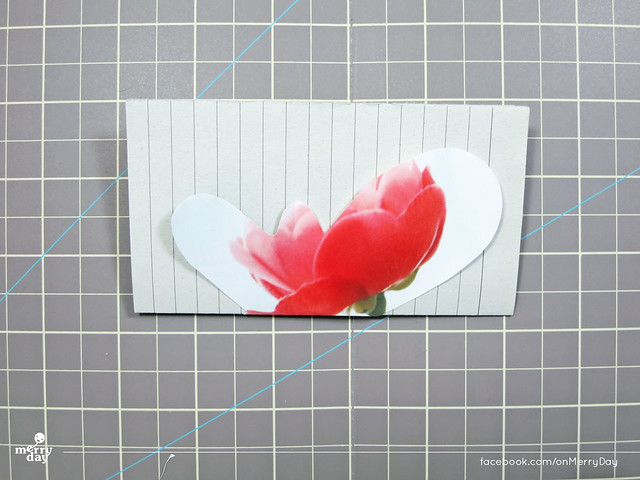
Again fold down the paper and use the second butterfly as a template. Trace the outline with a pencil. Then cut it out. This time you can cut exactly along the outline.  Then we will have two butterflies in the same size.

10bp-diy

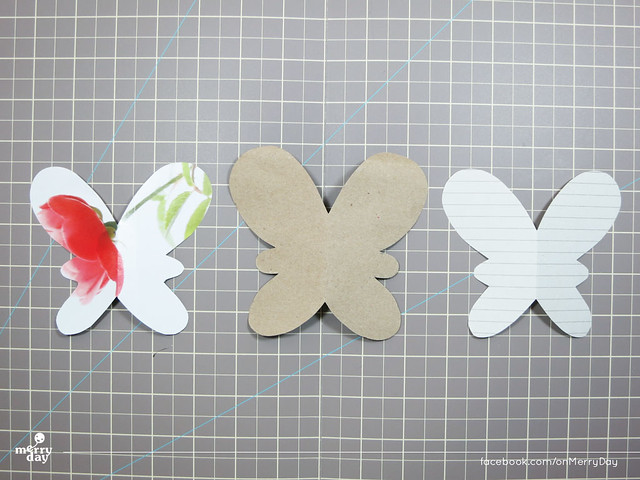
All the three butterflies are ready to be assembled next.

11bp-diy

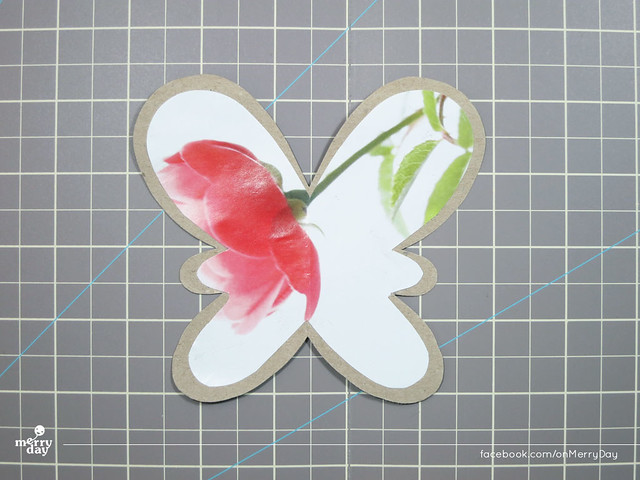
Glue down the outside part.

13bp-diy

Then the other one inside. This side will be the part for writing "This book belongs to" and then put your name on. If you plan to make this as a gift, leave it blank here.

14bp-diy

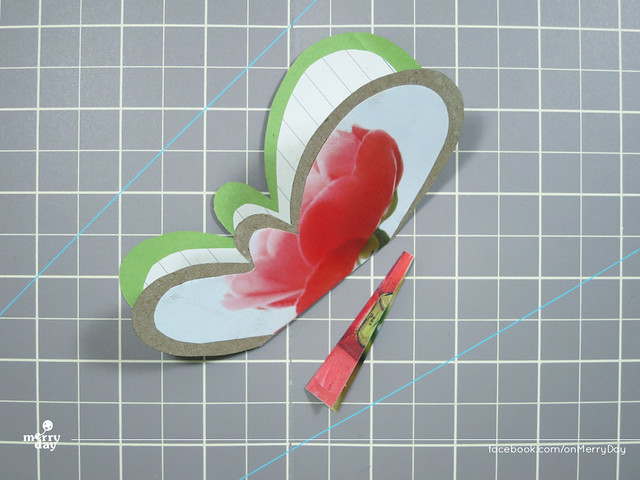
One very last step, cut a small piece of colorful paper fold down and make the butterfly's body!

15bp-diy

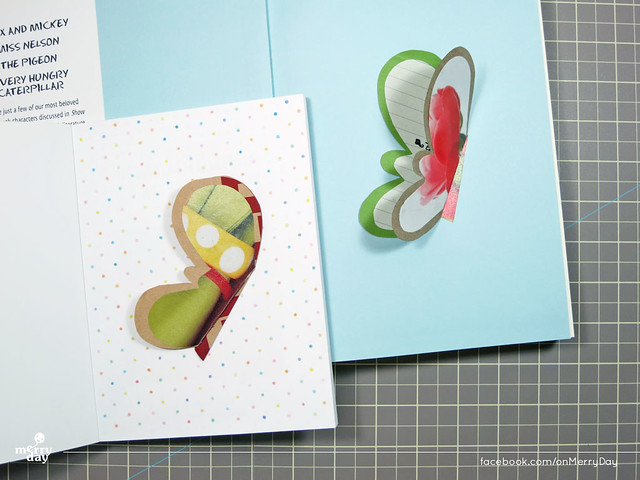
Now we have our own handmade butterfly bookplate.When you stick it on the page,  place the butterfly in slightly-slanting position so that it looks like it's flying :)

16bp-diy

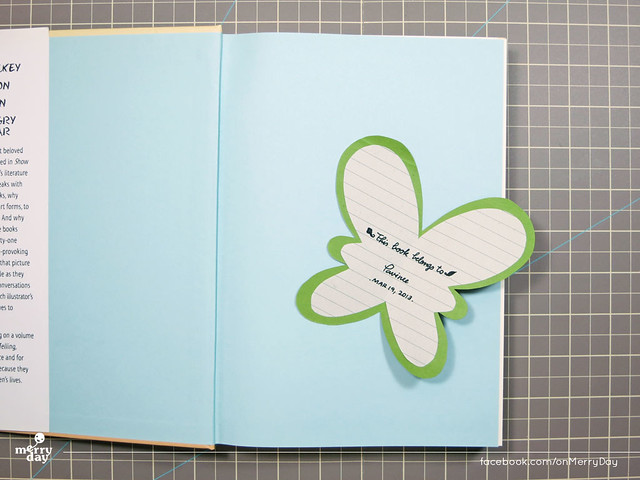
Try opening it. How do you like it?

This is actually the way of making pop-up card adapted to be used as bookplate.  I think it will be very touching to put your own little craft in books you will give to your loved ones. They will cherish it, I'm sure :)

I have another fun and cute ideas of making this kind of paper art. Will share them later :)
Thanks for stopping by. I hope you enjoy my very first DIY :)

18bp-diy


Related Posts Plugin for WordPress, Blogger...