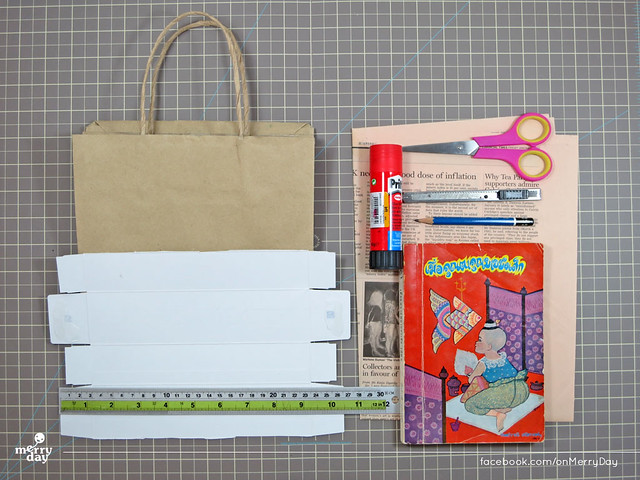
Another DIY idea I did for a TV show's DIY section I talked about last week. I did two ideas altogether. The first which was on air last week and I already posted the step-by-step instruction here is DIY project : Let's make butterfly bookplate! My other idea will be on air tomorrow. This time I'm going to make a book jacket from toothpaste boxes :)
I had been wondering how I could transform toothpaste boxes into something useful for some time. Don't know why I should think about it but I just did. My first idea was making bookmarks. Then I tried cutting a box and laid it out. I found that the size of the box paper, excluding the lid parts, is perfect for making a jacket for old book.
So, let's try making one :)
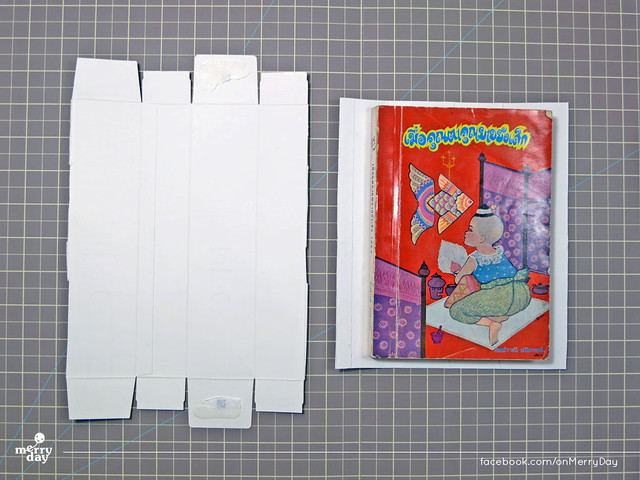
First, cut a toothpaste box and lay it out. Cut off the lids part from top and bottom. You will see that the remaining part is a bit bigger than my book which is a small pocket book (about 13 x18 cm). We don't need to cut more as the big sheet will function as the book's protector.

As the toothpaste box has its own creases, we don't need to fold the spine part ourselves. Just have to measure and cut this part a bit so that the jacket's spine will be a bit bigger that the book's.
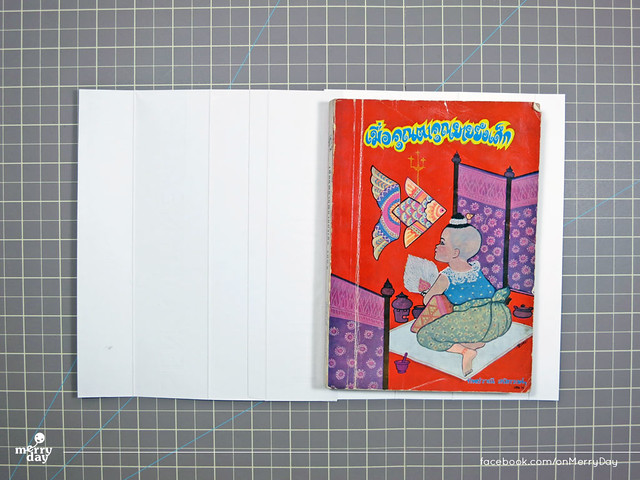
Cut another box just as we did with the first one. Now with two paper sheets, we have front and back of the jacket. Combine the two by gluing the spine part together.

We have the jacket! Next is to make the whole thing pretty. Find a used shopping bag or document envelope, measure and cut, make it a bit bigger so that it can wrap around the jacket for double protection.
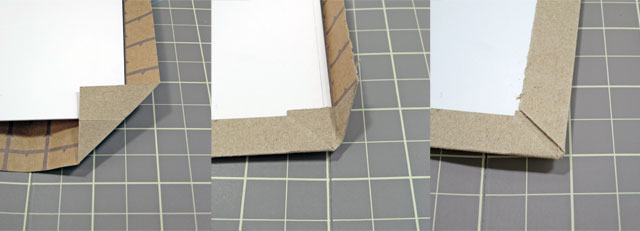
Above are the wrapping steps for the corners.

Next, cut a sheet of beautiful wrapping paper or maybe some big magazine pages and glue it down over the inner part to hide the toothpaste box.
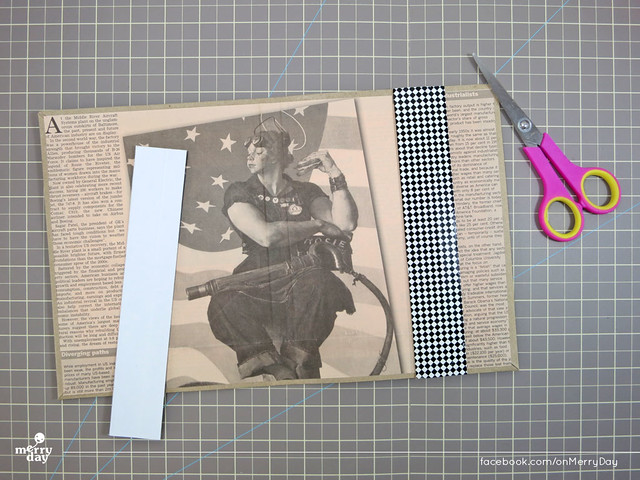
We will need locking parts to hold the book. I use two paper sheets left from the toothpaste box cutting in the first step to make these or you can find some other paper sheets. The sheets should be a bit thick and strong enough to hold the book. Cut it into two long rectangular pieces just as in the image. Cover them with lovely paper wraps. Make it beautiful.
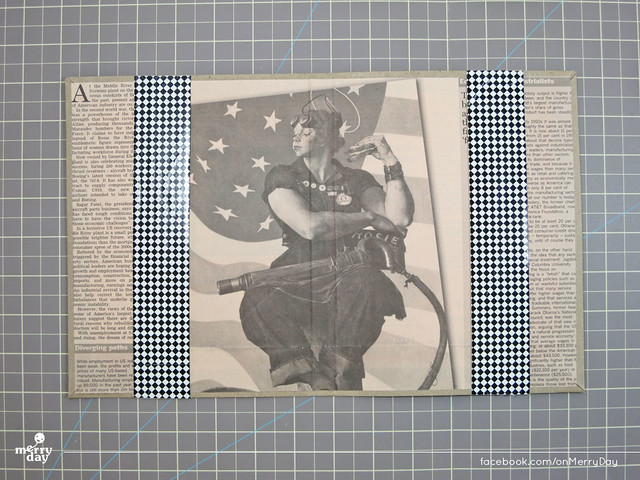
Attach the two parts left and right by gluing only the top and bottom of each rectangular sheet. Leave the middle part unglue so that we can slip the book's covers through.

Try insert the back cover.
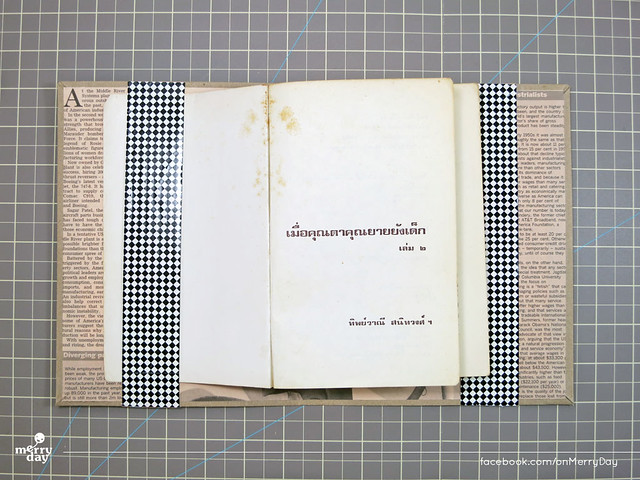
Then the front.

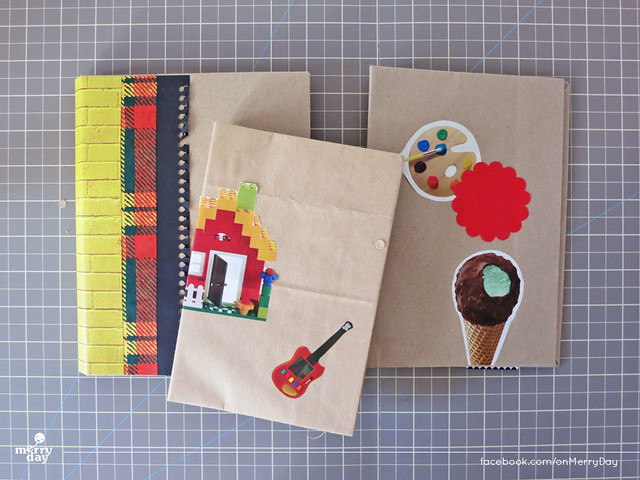
Almost done! The last step is to decorate the front. Make it your style with some bright colorful scraps of paper from notebooks or paper bags.
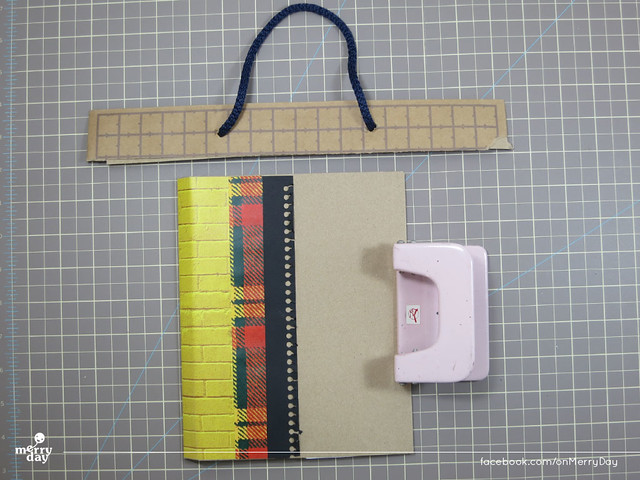
So, here is my design. You can use this jacket for day planner, notebook or make it as a wrapping of book gift. You can also add a strap made from the paper bag's rope handle. Another reuse!

Use paper puncher to punch out both front and back then add the ropes on. Complete!
Hope you like this DIY. I try to write the instruction as clear as I can. If you have any questions, please leave a comment. And if you think this idea is helpful, please share :)
This is the last idea I did for the TV show but I think I will continue thinking and making things from scraps of paper I have in my studio. Doing DIY is really fun and relaxing. It helps me think in different angles and once I get some ideas and start creating, the step-by-step process is just like a meditation practice. I really love that :)
PS. I just got an idea the other day while getting stuck in traffic. The idea is to transform tissue box into a card holder. Do you think I can make it? :)

Fun!
ReplyDeletePrecioso y Genial!!! Saludos desde España
ReplyDelete